OpenBSD on HP Stream 7
Recent events have rocked the mobile computing world to its core. OpenBSD retired the zaurus port, leaving users in desperate need of a new device. And not long before that, Microsoft released the Anniversary Update to Windows 10, but with free space requirements such that it’s nigh impossible to install on cheap 32GB eMMC equipped devices such as the HP Stream series, leaving users searching for a new lightweight operating system. With necessity as both mother and father, the scene is set for a truly epic pairing. OpenBSD on the HP Stream 7.
The HP Stream line is a series of budget computers in a couple form factors. The Stream 11 is a fairly typical netbook. However, the Stream 7 and 8 are tablets. They look like cheap Android devices, but inside the case, they’re real boys, er PCs, with Intel Atom CPUs.
To install OpenBSD on such a device, we need a few parts. Obviously, the tablet itself. There’s a dearth of ports on these things, but there is a micro USB port. Attaching anything useful requires an OTG “on the go” cable that creates a type A port. Attaching more than one useful thing requires a mini hub. And completing the install requires one each USB stick, keyboard, and network adapter.
Complete shopping list: tablet, OTG cable, mini hub, flash drive, keyboard, network adapter.
The Stream uses EFI, so we’re going to be installing the amd64 port. (The legacy i386 port doesn’t include bootloaders for such fancy devices.) This is a Bay Trail device, so it’s going to use the 32-bit bootloader, BOOTIA32.EFI, even though the CPU is 64-bit capable. Not to worry, however, the miniroot60.fs install image includes both EFI loaders, so we don’t need to concern ourselves with this detail. It just works. (Some more info about 32-bit EFI. OpenBSD is special in this regard in that we can boot a 64-bit kernel from a 32-bit loader.) Copy the miniroot to flash with a command like dd if=miniroot60.fs of=/dev/rsd2c bs=1m with an existing machine. Mind the device name!
First, we need to prep the machine to boot from USB. Actually, before doing anything, make sure you have a full charge. It’s going to be battery only from here on out. Plug everything in. Flash drive, keyboard, and network into the hub, hub into the OTG cable, cable into the port on top of the Stream.
Turn on the machine while holding the volume down button. This launches a mini menu from which we can enter the BIOS. There’s a little on screen keyboard in the corner, so this can be done even without a keyboard attached, but the USB keyboard should work. We need to change two settings in the boot section. First, turn off secure boot. Second, switch boot order to prefer USB. Save and exit. The first reboot reveals a confirmation screen checking that we really want to disable secure boot. We must enter a PIN and press enter. Enter the PIN shown on the screen and press enter. And we are go.
This should boot into the OpenBSD installer. There’s nothing special required here. Press enter, install stuff, etc. Creating new filesystems may take a while; eMMC isn’t as fast as the SSDs I’m used to. Done? Remove the flash drive and reboot.
(I’ve been informed everything works now without disabling devices.)
OpenBSD boots up and... panics almost immediately attaching acpibat. Unsupported RegionSpace which is code for the AML code tried to do something we don’t support yet. USB keyboards don’t work with the in kernel configurator, but we can save changes using config -ef on another machine to disable acpibat. Reboot and enter bsd.rd at the boot prompt, select shell, dhclient, mount, and grab a new kernel. Reboot.
OpenBSD boots up and skips over acpibat and... panics a little while later. Another bad ACPI device. The installer worked fine however, which is a good sign. Return to the source tree and compare GENERIC and RAMDISK to find several differences. Run config, disable some more devices, reboot into bsd.rd, install new new kernel, and reboot again.
OpenBSD boots up and skips over acpibat and skips over a dozen other ACPI devices and probes inteldrm and... the screen goes blank. Wait a while. Maybe it will come back? Nope. But maybe it’s still alive? Does ssh work? Yes it does! This makes life much easier. Now we can run commands locally instead of copying files about. We need to disable inteldrm as well. Save and reboot.
OpenBSD boots up and skips over acpibat and skips over a dozen other ACPI devices and skips over inteldrm and...
OpenBSD/amd64 (stream.home.tedunangst.com) (ttyC0)

login:
We did it!
Of course, there’s no X at this point. And definitely no touch screen. And no internal networking. However, by keeping our USB hub attached, we can drive the console and access the network. At least until the battery is depleted, even if we have no way of knowing how long that will be since we disabled all the ACPI devices, which also means no suspend or resume.
But it’s all worth it to know that we’ve unshackled this device from the proprietary operating system it ships with. One can practically taste the freedom!
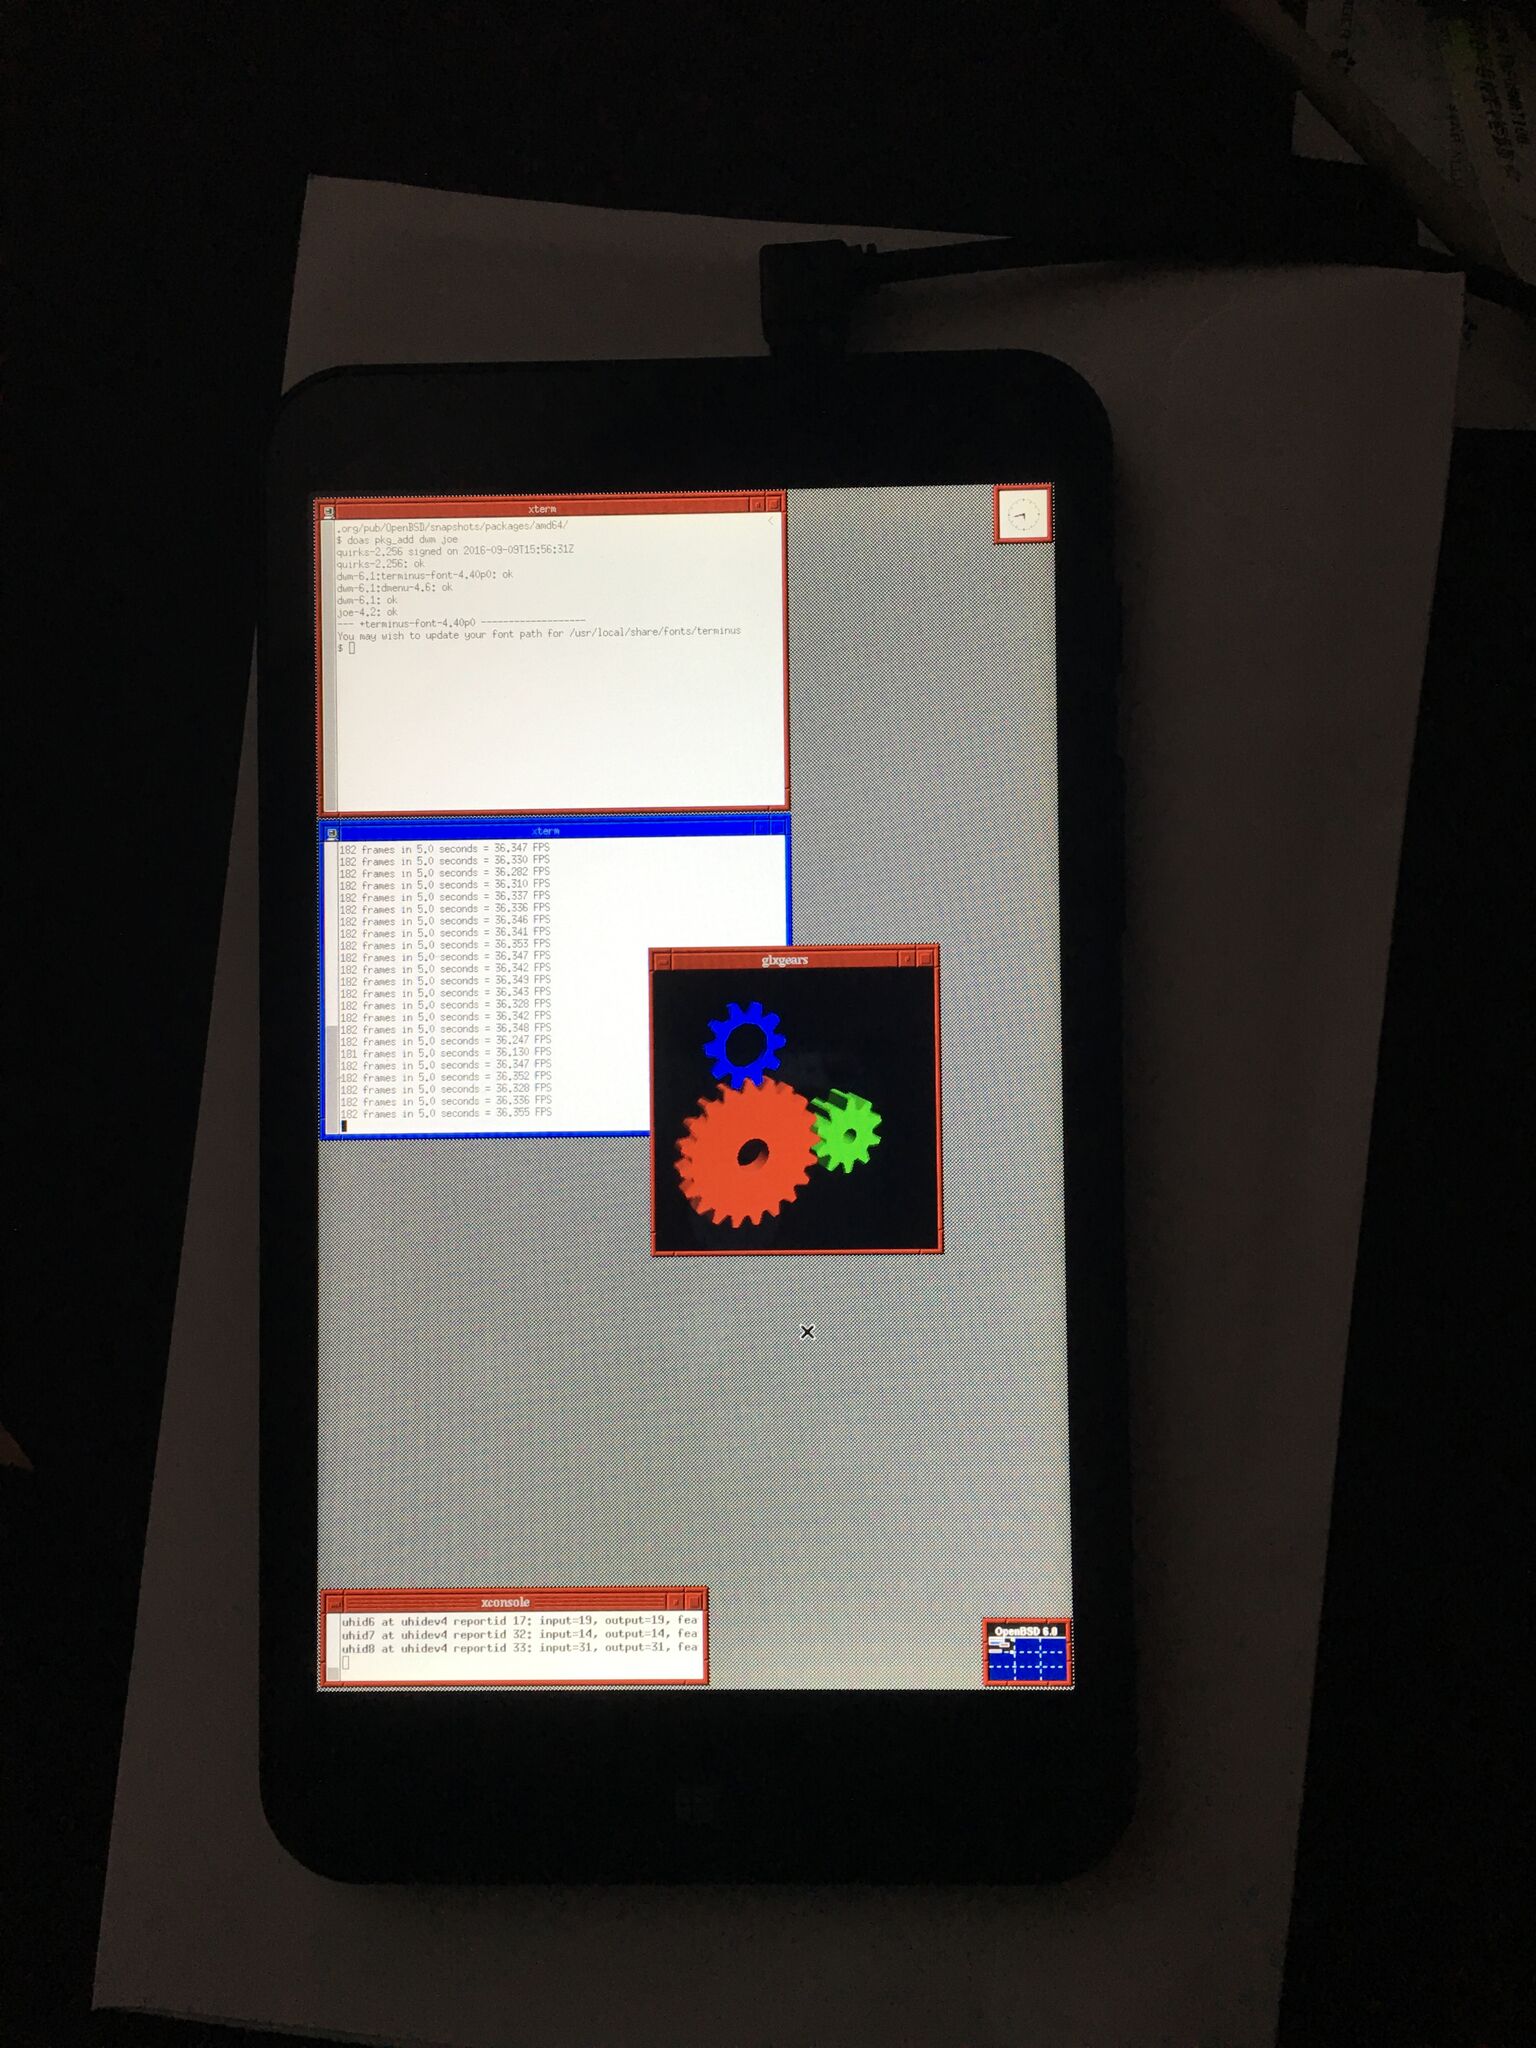
Ah! We can even get X. Requires an xorg.conf however, which I literally haven’t used in ten years. X by default still tries attaching intel and then vesa drivers, neither of which work. We can tell it to use wsfb.
Section "Device"
        Identifier "default device"
        Driver "wsfb"
EndSection
Just add a mouse to our USB hub and now we’re party rockin!
